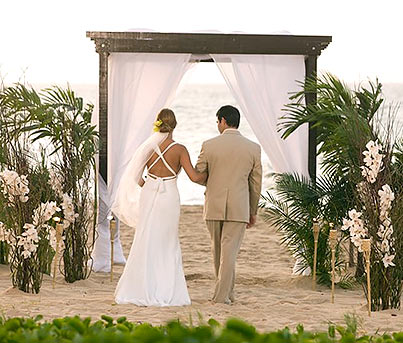
My Story telling about the birth and growth of EnhancEvents, LLC. The one thing I live for, the satisfaction, the emotions and the smiles of my clients every time we accomplished their Dream Wedding.
About Me

- EnhancEventsLLC
- North East, MD, United States
- Every upscale bride and groom deserves an upscale experience. Whether it is an intimate or lavish affair, EnhancEvents, LLC will ensure it is what your heart desires. With attention to detail, an eye for perfection, and full dedication, they will deliver the most personalized affluent wedding of your dreams. EnhancEvents, LLC has executed the most luxurious events in the Mid Atlantic and the Caribbean with professionalism, poise, and sophistication. We work diligently toward the goal of creating your masterpiece of a wedding followed by its astounding delivery. We have no limits to what can be created: you dream it and we will deliver it.

Saturday, December 29, 2012
Your Wedding Full Check List
Wedding Checklist wedding is a festive event with tons of details and planning required. Now is not the time to procrastinate! We’ve put together this helpful checklist to guide you through the planning process and make sure you don’t miss anything. Once the planning is done, you can relax and get some much deserve rest!
1. Pick your wedding date
Decide on wedding style
Decide on the budget
Meet with those helping with budget to discuss financial responsibilities
Reserve ceremony site
Visit possible reception sites and reserve on
Start on guest list for approximate count
Pick groomsmen and bridesmaids
Consider hiring a professional wedding consultant for all the planning and for coordinating the wedding day
2. 9 – 12 Months ahead
Send Save-the-Date cards to everyone on your guest list to reserve the date
Shop for and order your:
Headpiece/Veil
Jewelry
Shoes
Undergarments
Wedding gown
Meet with and reserve your: for and order your:
Baker of wedding cake
Cater
Ceremony musicians
Florist
Reception band or DJ
Videographer
Shop for and order your:
Meet with your Officiant
Plan details of reception: colors, decorations, balloons, favors, overall theme
Register for wedding gifts
3. 6 – 9 Months ahead
Get engagement photo taken
Submit engagement photo and announcement to local newspaper
Discuss honeymoon plans (pick location and make reservations)
Get passport if needed
Select and order bridesmaids’ attire:
Accessories
Dresses
Shoes
Finalize men’s formal wear and place orders
Discuss wedding colors scheme with mothers so they can coordinate and finalize their outfits
Attend parties and showers in your honor
Purchase thank you notes/cards and write them as need arises
Experiment with hairstyles and makeup
Reserve wedding day transportation
Reserve any party rentals equipment (tables, tent, chairs, etc.
4. 4 – 6 Months ahead
Book stylist or salon for bridal party hair, nails and makeup
Finalize the guest list
Reservations for accommodations for out-of-town guests
Reserve wedding night accommodations
Find and reserve rehearsal dinner location
Select and order wedding band
Select and order wedding stationery;
Announcements
Envelopes and seals
Informal cards
Invitations
Reception cards
Response cards
Thank you notes
Select and order ceremony necessities:
Aisle runner
Flower girl basket
Garters
Guest book and pen
Pew bows
Ring bear pillow
Unity Candle
Select and order reception necessities:
Cake box
Cake top
Centerpieces
Decorations
Matchbooks
Place cards
Serving set for cake
Toasting glasses
Wedding favors
5. 2 – 4 Months ahead
Begin addressing and assembling invitations
Take an assemble invitation to post office to determine postage per mailing
Buy stamps usually you can get LOVE themed stamps
Buy and wrap groomsmen gifts and bridesmaids gifts
Finalize arrangements with vendors;
Baker of wedding cake
Caterer
Ceremony musicians
Florist
Photographer
Reception band or DJ
Videographer
Mail Invitations to arrive at least six weeks before
Wedding date
Keep track of response card received
Finalize ceremony order with Officiant-ceremony music, readings, vows
Arrange ceremony rehearsal and notify participants
Order wedding programs
Confirm deliver dates of bridal gown and bridesmaids dresses
Meet with caterer to discuss menu
6. 1 – 2 Months ahead
Work on reception seating arrangement
Prepare place cards
Take care of financial/legal details:
Insurance policies
Joint bank accounts
Prenuptial agreements & wills
Gather forms for making name change
Write your toasts and speeches
Write your wedding vows
Call county clerk’s office for marriage license details and schedule date to obtain yours
Practice your wedding hairstyle
Final fittings for wedding gowns and bridesmaids gowns
Keep track of wedding gifts received and thank you notes written
Confirm duties with wedding helpers:
Clean up crew
Flower pinners
Gift table attendant
Guest book attendant
Host and hostess
Personal attendant
Punch, cake and coffee servers
Readers
Set up crew and decorators
7. 2 – 4 Weeks ahead
Arrange for professionals to preserve your gown and bridal bouquet
Follow up on missing RSVP’s and finish seating chart/place cards
Confirm final guest count to caterer and reception site
Write rehearsal dinner and wedding toasts
Confirm honeymoon arrangements
Prepare a “Must have shot list” for your wedding photographer and videographer
Practice your wedding dance wearing your bridal shoes
Finalize your Must play list and don’t play list with your musicians and DJ
Pick up your wedding rings
Mail rehearsal dinner invitations
Purchase small candles, candies, and mints for your guests powder room
8. 1 Week ahead
Confirm all services and reservations
Confirm arrangements with ceremony and reception sites
Finalize your wedding-day schedule and share with your attendant, parents and vendors, including receiving line order
Create a wedding box to gather your ceremony accessories (marriage license, candle, ring pillow, basket, guest book, etc.) and assign someone to transport
Create a wedding box to gather your reception accessories (guest book, cameras, toasting goblets, cake topper, etc._ an assign someone to transport
Pack for wedding night
Pack items for ceremony and reception sites
Pack for honeymoon
Make arrangements for the gifts opening
Pick up wedding gown and check fit
Have groom pick up formal wear and check fit
Have groomsmen and bridesmaids pick up their attire and formal wear and check fit
Assemble a wedding day emergency kit
Host bridesmaids’ luncheon
Put fees due on the wedding day in envelopes for the best man to distribute
Get plenty of rest so you’ll look your best for pictures
9. 1 Night ahead
Hand out ceremony box to appropriate person
Hand out reception box to appropriate person
Hand out favor and decoration boxes to appropriate person
Gather together your wedding gown, accessories, and emergency kit
Get manicure, massage and pedicure
Rehearse ceremony with Officiant and wedding party
10. The Day of your Wedding
Your wedding day has arrived! Relax, you might be nervous, but try to eat breakfast and drink lots of fluids
Take a lavender bath, it’s very relaxing
Wear a button-down shirt to your hair and makeup appointments
Rehearse ceremony with Officiant and wedding party
11. After your Wedding
Get your wedding gown clean and preserved
Preserve your bouquet
Write and mail thank you notes
Complete you name change kit
Check into your bridal store registry for completion
Meet with the photographer and videographer to finalize album and video
Be happy you are now finally married to your best friend.
Prepared by: Kay C. Marie Kravchuck
EnhancEvents, LLC
North East, MD
Cayey, PR
Slanesville, WV
Kissimmee, FL
(888) 533-5572 ext. 104
This material it is copy right protected law.
The Passion of a Dream Wedding: Napkin Folding Arrangements
The Passion of a Dream Wedding: Napkin Folding Arrangements: Napkin Folding Arrangements Napkin Folding Arrangements are a simple way to add just that extra little something to your dinner time celeb...
Sunday, July 29, 2012
Saturday, June 30, 2012
Saturday, May 26, 2012
Tuesday, April 24, 2012
Friday, March 30, 2012
Napkin Folding Arrangements
Napkin Folding Arrangements
Napkin Folding Arrangements are a simple way to add just that extra little something to your dinner time celebrations. Below are eleven napkin folds and instructions on how to create them.
French Pleat
Candle
Crown
Goblet Fan
Peak
Flame
Trifold
Opera Fan
Bird of Paradise
Cardinal Hat
Rose
________________________________________
French Pleat
1. Fold napkin in quarters
2. Roll the first layer of the napkin toward you to the center
3. Fold the second layer toward you and under the first - Do not Roll.
4. Leave the same width of the napkin as the rolled edge.
5. Fold the next layer of the napkin away from you and under the second leaving the same width as other two folds.
6. Fold under the right and left side edges to center back.
________________________________________
Candle
1. Fold napkin in half diagonally forming a triangle.
2. Fold one-fourth of the base edges of napkin up forming a cuff.
3. Turn napkin over. Carefully roll left to right.
4. Tuck the remaining corner inside the cuff to hold the Candle firm.
5. Position the Candle with the highest point of the napkin facing you.
Crown
1. Fold the napkin in half diagonally forming a triangle.
2. Fold the left and right triangle to the top forming a square.
3. Turn the napkin to form a diamond. Fold the bottom point 2/3 of the way to the top point and fold the bottom point back again to the base line.
4. Turn napkin over and tuck the far corners into one another forming a round base.
5. Stand a napkin upright and flair out the two top corners to form a Crown.
________________________________________
Goblet Fan
1. Fold napkin in half with the edges at the bottom
2. Accordion pleat form right to left.
3. Fold the bottom third up.
4. Insert into goblet and spread pleat to form fan.
________________________________________
Peak
1. Fold the napkin toward on end into quarters.
2. Fold the right and left edge under and towards you creating a triangle at the top of the napkin.
3. Roll the right and left edges up into the base edges of the triangle.
4. Turn the fold over standing the triangle point up with the open edge facing you.
Flame
1. Fold tall four corners of a flat napkin to the center.
2. Fold the bottom half under the top half.
3. Fold the right half over the left half.
4. Turn the napkin clockwise to create a diamond.
5. Roll the top layer toward center forming a band.
6. Turn the second layer under to form a second band.
7. Fold the left and right hand edges under.
________________________________________
Tri-fold
1. Fold the napkin in half diagonally form a triangle with the long point facing you.
2. Fold the far left and right had corners of the triangle toward you to the bottom point.
3. Fold the napkin in half bringing the bottom point under to meet the top point.
4. Left the napkin at the center to stand upright on the two side edges.
_______________________________________
Opera Fan
1. Fold napkin in half.
2. Fold width into accordion fold leaving last four inches flat.
3. Fold accordion in half with folds on outside; four inch flat will protrude from the center.
4. Create a stand by folding the four inch flat toward the base of napkin letting the folds fan out.
________________________________________
Bird of Paradise
1. Fold the napkin in quarters with the four edges toward you.
2. Fold the edges up to form a triangle.
3. Fold the left and right points of the triangle to the center and then fold the extended points under.
4. Lift the center and hold the base - pull the four napkin edges out of the center to create the bloom.
________________________________________
Cardinal Hat
1. Fold the napkin in diagonally forming a triangle.
2. Fold the left and right hand corners of the triangle to the top.
3. Turn the napkin over so that no fold are visible.
4. Fold up the bottom tip of the triangle and fold in half.
5. Fold the right side over the left making a circle.
6. Tuck one end of the triangle into the other.
7. Place the Cardinal Hat in an upright position and flare out points slightly.
________________________________________
Rose
1. Fold all four corners of a flat napkin into the center: then fold four points again to the center.
2. Turn the napkin over and fold four points again to the center pressing all folds tightly.
3. Turn napkin to form a diamond. Using one hand to hold two points at front center of the napkin and with the other hand reach under that point and pull up flap.
4. Repeat at three other points.
5. Holding center points reach between petals and pull out additional flaps.
Thursday, March 29, 2012
TRADITIONAL PUERTORRICAN WEDDING (OUR CULTURE)
Except for capias
 and bride dolls, there are no unusual wedding traditions. But you can always give your wedding a Puerto Rican flavor. When you think of things Puerto Rican you think of; coquí, orchids, tropics, palm trees, seashells, Taínos, guitars, coconuts, rum, pig roast, and amapolas. You can use things in the wedding and party that remind us of our Enchanted Island.
The wedding party could be held in the bride's parent’s house and yard area. That is traditional because long ago there were no ballrooms for rent.
Lights were strung on the trees outside to light the yard for the party - I am talking about strings of large bulbs. If it is impossible to have it there finds a party room that has a yard that you can use.
Wealthy families would serve a large banquet, jibaritos served a rotisserie roasted pig. That sounds like an unforgettable event - doesn't it?
Serve all Puerto Rican foods and desserts.
Make the wedding cake coconut, rum, or pineapple flavored.
Cake decorations may include seashells, pineapple motifs, etc.
and bride dolls, there are no unusual wedding traditions. But you can always give your wedding a Puerto Rican flavor. When you think of things Puerto Rican you think of; coquí, orchids, tropics, palm trees, seashells, Taínos, guitars, coconuts, rum, pig roast, and amapolas. You can use things in the wedding and party that remind us of our Enchanted Island.
The wedding party could be held in the bride's parent’s house and yard area. That is traditional because long ago there were no ballrooms for rent.
Lights were strung on the trees outside to light the yard for the party - I am talking about strings of large bulbs. If it is impossible to have it there finds a party room that has a yard that you can use.
Wealthy families would serve a large banquet, jibaritos served a rotisserie roasted pig. That sounds like an unforgettable event - doesn't it?
Serve all Puerto Rican foods and desserts.
Make the wedding cake coconut, rum, or pineapple flavored.
Cake decorations may include seashells, pineapple motifs, etc.

 The wedding "brindis" used to be made using coconut cups because there were no fancy glass goblets. The bride and groom may drink a traditional café con leche (espresso) using coconut cups - done more like a ritual and photo opportunity.
 I've seen websites selling these coconut cups - some of them are really nice. A traditional brindis may also be included.
Capias for all the guests. The capias were attached to ribbons that hung from the bridal bouquet. At the reception the bride and groom cut off the capias from the bouquet and pin them on the guests. This is a great way for the bride and groom to make contact with each guest. The capias had a piece of “abeto” fern (spiny fern used in weddings) attached to the capia (about 5 inches of fern), and the capia sat in the middle of the fern. The fern lasts a long time. The capias include a piece of folded narrow ribbon printed with the bride and groom’s names on one end, and the date of the wedding on the other. This ribbon can be ordered at bridal shops.
The bride's bouquet was made using wild flowers of Puerto Rico – mostly amapolas, but also Mimosas flowers, and margaritas (include local greenery and abeto). Puerto Rico has over 50 native orchid species. Use orchids.
The bouquet may include a fan - in Puerto Rico fans were a traditional part of a woman's attire. Wealthy women had fans in different colors to match their clothing. There is a long and detailed history of fans - too long to go into now.
Bridesmaids may carry a fan and an amapola (maybe a silk amapola) - the flor maga, which is similar to an amapola, is the official flower of Puerto Rico.
I've seen websites selling these coconut cups - some of them are really nice. A traditional brindis may also be included.
Capias for all the guests. The capias were attached to ribbons that hung from the bridal bouquet. At the reception the bride and groom cut off the capias from the bouquet and pin them on the guests. This is a great way for the bride and groom to make contact with each guest. The capias had a piece of “abeto” fern (spiny fern used in weddings) attached to the capia (about 5 inches of fern), and the capia sat in the middle of the fern. The fern lasts a long time. The capias include a piece of folded narrow ribbon printed with the bride and groom’s names on one end, and the date of the wedding on the other. This ribbon can be ordered at bridal shops.
The bride's bouquet was made using wild flowers of Puerto Rico – mostly amapolas, but also Mimosas flowers, and margaritas (include local greenery and abeto). Puerto Rico has over 50 native orchid species. Use orchids.
The bouquet may include a fan - in Puerto Rico fans were a traditional part of a woman's attire. Wealthy women had fans in different colors to match their clothing. There is a long and detailed history of fans - too long to go into now.
Bridesmaids may carry a fan and an amapola (maybe a silk amapola) - the flor maga, which is similar to an amapola, is the official flower of Puerto Rico.
 During the ceremony - in very low volume - play a tape of coquí sounds - that would be most romantic.
The Doll - At the traditional Puerto Rican reception it is customary for a doll, dressed similar to the bride, to be placed at the head of the main table. The doll can be a Barbie or a larger doll. She wears a wedding dress to match the bride's.
The bride and groom may choose a danza criolla, a Puerto Rican waltz. La Borinqueña is a waltz. There are many, many beautiful Puerto Rican orchestra pieces for ballroom dancing.
If you are interested in the Taíno culture use strings of seashell jewelry for the bridal party and to decorate the table. Centerpieces could reflect our Taíno heritage using petroglyphs somehow. Use lots of candles too.
Centerpieces - make small palm trees using “abeto” ferns for centerpieces and decorate with seashells.
If you can afford it, hire a local Puerto Rican folk dance group to entertain during dinner.
Of course - play Puerto Rican music.
Flowers were used to decorate the church, house, and the yard. Again these were flowers that grew wild including amapolas, margaritas and Mimosa flowers as well as local greenery and palm branches.
Select a wedding invitation with a tropical theme like ferns, palm trees, or sea shells.
Select matching napkins.
During the ceremony - in very low volume - play a tape of coquí sounds - that would be most romantic.
The Doll - At the traditional Puerto Rican reception it is customary for a doll, dressed similar to the bride, to be placed at the head of the main table. The doll can be a Barbie or a larger doll. She wears a wedding dress to match the bride's.
The bride and groom may choose a danza criolla, a Puerto Rican waltz. La Borinqueña is a waltz. There are many, many beautiful Puerto Rican orchestra pieces for ballroom dancing.
If you are interested in the Taíno culture use strings of seashell jewelry for the bridal party and to decorate the table. Centerpieces could reflect our Taíno heritage using petroglyphs somehow. Use lots of candles too.
Centerpieces - make small palm trees using “abeto” ferns for centerpieces and decorate with seashells.
If you can afford it, hire a local Puerto Rican folk dance group to entertain during dinner.
Of course - play Puerto Rican music.
Flowers were used to decorate the church, house, and the yard. Again these were flowers that grew wild including amapolas, margaritas and Mimosa flowers as well as local greenery and palm branches.
Select a wedding invitation with a tropical theme like ferns, palm trees, or sea shells.
Select matching napkins.
 If you need napkin rings they can be made using elastic and have a sea shell on top with some ferns. The napkin rings are those rings that hold the silverware that has been rolled on a napkin. ...
Honeymoon – a Caribbean Cruise, of course.
If you need napkin rings they can be made using elastic and have a sea shell on top with some ferns. The napkin rings are those rings that hold the silverware that has been rolled on a napkin. ...
Honeymoon – a Caribbean Cruise, of course.


Tuesday, March 27, 2012
Thursday, March 15, 2012
Friday, March 9, 2012

Thursday, March 1, 2012
Monday, February 20, 2012
Saturday, February 18, 2012
Thursday, February 2, 2012
Reception Seating For Wedding Party Guests
Reception Seating For Wedding Party Guests
Concern Bride to be:
We are having a rather large wedding party and will be using a head table that includes the bride, groom and the entire wedding party. One of our groomsmen is bringing his long time girlfriend. She does not know anyone at the wedding and would like to sit close to her boyfriend. We have no idea where to seat her. What do you suggest?

Solution:
When the wedding party is large consider using a U-shape table with the bride and groom seated at the center of the center table followed by the attendants seated with their husbands, wives, and significant others. One would never want to have a guest feel alone or out of place. So for wedding parties that are large, use round tables positioned next to each other. The bridal couple may be seated at their own table or with the Best Man, Maid of Honor and their respective partners while the other tables will play host to the remainder of the attendants each seated with their partners.
The Proper Formal Table Setting For Your Luxurious Wedding Reception
Your wedding reception is a formal affair. Proper etiquette and good table manners calls for the host to ensure the table has been set correctly. The place settings should reflect the menu choices and always be positioned correctly. Don't leave anything to chance. It is best to consult with your catering manager to be sure everything will be set properly.
There are three types of place settings: Formal, Informal and Basic with two common rules shared.
1. The utensils are placed in the order of use from the outside in.
2. With a few exceptions:
Forks are place to your left.
Knives and spoons are placed to your right.
The Elements of the Formal Place Setting are not complicated. There are many elements, yet each is used in the order of service. Once you visualize where each element is placed and see how each is used during the meal, you will appreciate the fine art and nuance of a formal dinner setting.
SALT & PEPPER SHAKERS
are generally unsightly. As they are important to the meal, consideration should be given to them as part of the table decor.
THE CHARGER PLATE is an oversize and decorative plate set in place for each guest. The use of a Charger is highly recommended as it presents a lovely and complete look to your table before the food has been served. Once the food course begins, it will remain in position. The plate for each food course will be placed on top of the Charger and removed, leaving the Charger to decorate the table between courses.
THE CHINA selection can be used as an added element of décor to your table setting. Choose a pattern that enhances your charger plate and that beautifully accents your table lines. Your dining china is made up of 3 main elements: Bread or Butter, salad and dinner plates.
THE NAPKIN is placed on top of the charger plate. In the absence of a Charger, the Napkin is placed in the empty space where the dinner plate will be placed. Although the napkin placement does not change you do have a choice on how to present it. You may choose the fabric and color of the napkin as well as the napkin fold. Your napkin is also a great location to insert your menu card.
THE BREAD & BUTTER PLATE is placed above the forks on the left with the butter knife placed diagonally on top of the plate. Place the handle facing the right and blade faced down.
THE SALAD PLATE is a smaller than your dinner plate and, when served, is placed on top of your charger plate.
THE DINNER PLATE for the main entree will be placed on top of your charger plate.
THE FLATWARE selection is equally important as a decorative element. You may select a elegant sterling silver pattern that will blend in nicely with your tabletop décor or a more eccentric pattern with gold accents and engraving for more of a statement. No rules apply to selecting flatware other than making sure that you include the appropriate elements that will be used for your menu selections.
THE DINNER FORK is the largest of the forks and is placed to the left edge of the charger plate.
THE SALAD FORK is placed to the left of the dinner fork. Should your menu require your salad to be served after the entree the small salad fork is placed to the right of the dinner fork, next to the charger!
THE FISH FORK is placed farthest to the left of the dinner fork because it is the first fork used. Only set a fish fork if fish is to be served.
THE SALAD KNIFE is included if the salad is to be served first and is placed to the right of the fish knife.
SOUP SPOON is placed to the right of the knives if soup is to be served as a first course.
OYSTER-COCKTAIL FORK is set to the right of the spoons if shellfish is being served. Please note: this is the only fork ever placed on the right of the plate and although very cute, in an effort not to confuse your guests, please do not place them on the table if you are not serving a fish or seafood course.
GLASSWARE is placed to the upper right of your dinner plate and can number up to five depending on your beverage service. It is a very important element on your table top. It enhances the mark you are placing on your table décor. As with your china pattern you may select from a variety of glassware to accompany your place setting. Your pattern selection may consist of clear crystal, colored glassware or an elaborate pattern.
THE WATER GOBLET is placed directly above the knives.
THE CHAMPAGNE FLUTE is placed to the right of the water goblet.
THE WINE GLASSES are set slightly below and to the right of your water goblet.
THE SHERRY GLASS is placed to the right of the red and white wine glasses.
THE DESSERT COURSE
Depending on how much room you have on your dining table, you dessert spoon or fork and coffee spoon may be brought to the table along with the dessert and coffee or placed horizontally at the top of the dinner plate. In the latter scenario, your coffee spoon is placed closest to the top of the dinner plate followed by the dessert spoon on top of the coffee spoon. In this scenario, both spoon handles should be pointing toward your right.
Should your dessert require a fork, the dessert fork is placed on top of the coffee spoon with the tines pointing to the right, handle to the left.
COFFEE is served butler style with the coffee spoon on the saucer to the right of the handle. You may also elect to have the coffee spoon incorporated into your flatware presentation and is placed closest to the top of the charger plate. Your coffee cup and saucer will be in the same pattern as the china chosen for dinning.
The design of the table is a major visual factor when guests enter the reception room. A beautiful table has harmony and balance. The centerpiece is the anchor of the design and the place settings must be positioned at an equal distance from each other and from the centerpiece.
Wedding table settings from Traci Romano Events.
Individual Wedding Cake Desserts Elegant Cheese Cakes. Glassware by Vera Wang. Napkins by Wildflowers. Flatware by Carolyne Roehm.
Wednesday, January 18, 2012
While you trying to do your planning!
Somehow people expect the best of the best. While they do want that, they would like to do their design, planning, budgeting, orchestrating the entire event. In the mean while your fiance, family members and friends are getting the best of you. Stress, Stress, and more Stress.
This can cause a straingh in your relationship with all people involved. That is why you should hire or
This can cause a straingh in your relationship with all people involved. That is why you should hire or
Subscribe to:
Posts (Atom)